Instructions, tips and tricks
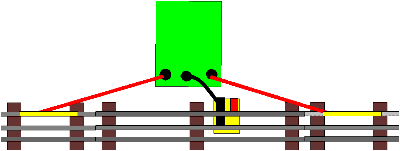
The Marx-type crossing flashers were very simple. They had a simple shoe, or plate, attached to one or more wires. This shoe fit over the rail. Power was introduced when the train's wheels passed over it. They made a connection from the opposite outside rail, and so the intermittent passing of wheels gave the flashing effect..

Sometimes an accessory is missing the plate. There are several alternatives:
Flashers can be connected to a Lionel 154C connector.
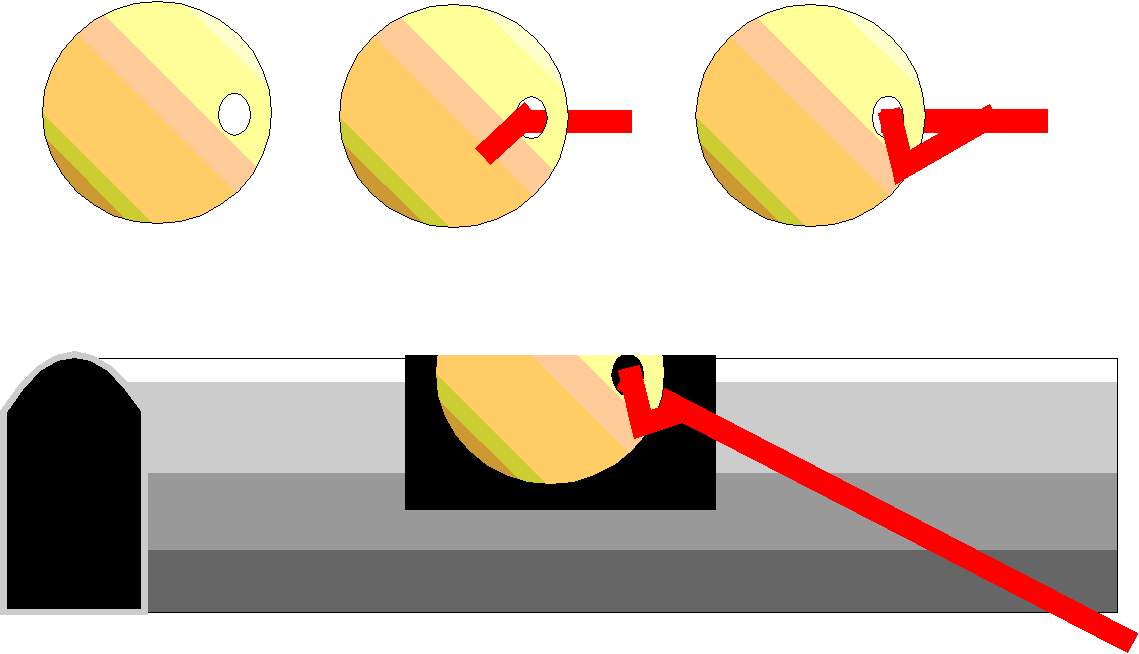
A new plate can be made easily, with thin copper plates. Poke a hole in the plate and affix wire. Place black tape over the rail, then bend copper piece over the tape. Make sure it is flush and does not impede wheels passing over it.

Note that some signals, such as the plastic Bell Ringer / Flasher had only one such clip. The other wire was connected to the third rail by using a regular lockon. Lockons from Lionel and K-Line work with Marx products. In fact, the Lionel / K-Line lockons are better.
You may occasionally encounter a simpler device with only two terminals and one rail clip. Here is how it might be wired:

Original Instructions

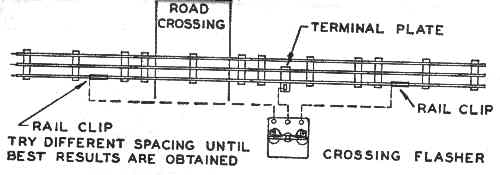
1) Place Crossing Flasher beside track, as shown in diagram.
2) Connect the two Rail Clip Lead wires to the outside binding posts, located on the base of the Flasher.
3) Connect the Terminal Plate lead wire to the center binding post of the Flasher.
4) Insert the upright blade of the Terminal Plate into the groove on the under side of the Center Rail, press firmly into place.*
Connect Rail Clips to the outside rail of the track by forcing the Clip down over the top of the rail. Be sure that the Rail Clips are pressed firmly against the top of the rail. Otherwise the train will not operate over the clips smoothly. Handle the Rail Clip and Lead Wires carefully to avoid breaking the soldered connections.
6) Best results can be had by having both rail clips assembled to the one section of track. Vary the distance between the rail clips to determine the best "Off" and "On" intermittent lighting effect from the flasher.
7) Follow the diagram carefully when setting up the Flasher and no trouble will be experienced.
8) As the car wheels pass over the Rail Clips, the signal will flash Off and On intermittently
(Note: a lockon can be substituted for the Terminal Plate. Connect wire to the clip that contacts the center rail only!)
Click here to return to Marx Accessory Index