Copyright 2000 T. Sheil & A. Sheil All rights reserved
Step-by-Step
Garden Railroad
We opted to build a garden railway to enhance our backyard. Since buying
our home last year, we've spent many hours making the yard attractive.
(The previous owners had neglected the yard entirely). Prior
to the railway, two projects had already been completed.
1) a gravel path from the driveway, past the garage to the back. This
path is about 18 inches wide. I dug out a trech 4 inches deep, then
emplaced masonry stone that we found in the yard. Stones are about
16 inches apart. Weathered brick -we dug up 160 of them back there
- was used along the sides. A landscaping gravel was poured into the
trench. In fron of the garage, we used a round masonry stone bought
from a local nursery for a whopping $2.00. The path was entended into
the trees, where we have a hammock.
2) a tree stump and mound was re-used. Weathered brick was coursed
around the stump. Topsoil replaced mortar, and three courses of brickwere
laid. With each course, topsoil was poured into the circle of brick.
Bricks were angled slightly inward. The stump itself was two
courses high. The space between the outside of the stump and the inside
of the brick was about 4 to 6 inches.
Thin, small slate pieces were placed at the base of the brick "well".
Tiger lilies were planted between the stump and brick. Natural growth
from the yard filled in the gaps.
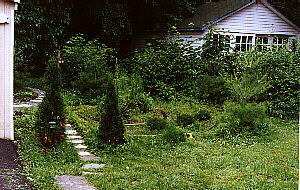
The railway area from the front
|
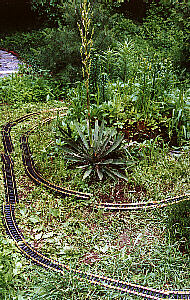
Front Left - track placed loosely prior to trenching.
|
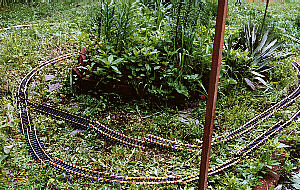
From rear left, behind brickwell
|
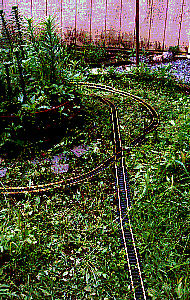
Facing rear left, from right rear of garden
|
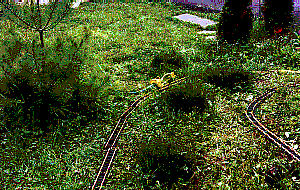
Looking to front left, from right corner. Note heather and pine tree
|
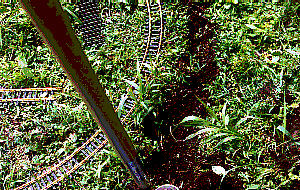
Trenching - track is moved aside, and digging commences. In the end,
it's easier this way.
|
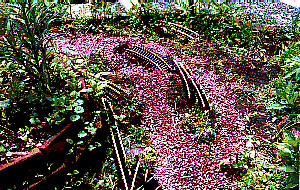
Ballasting with terra-cotrta gravel
|
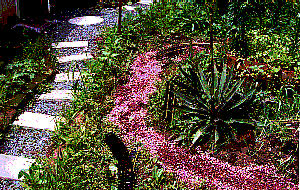
Ballasting around brickwell
|
To make the railway, certain problems had to be faced. These included:
Grades - making sure that trains could move smoothly on a gentle slope.
Drainage: which way water flows during a bad storm.
Tracking around the brick well with enough space for a second loop.
Track: we opted for Artistocraft track. The necessary track was supplied
as two boxes of 5" diameter curves, one box 12" straights and one box 24"
straights. A 30 degree crossover and two boxes of Bachman trestles
completed the package.
One problem: not all #1 gauge / G Scale track is compatible with outdoor
use. Bachmann track rusts badly if left outside overnight. Aristo
track is made for outdoor use.
The layout itself is a "crazy pretzel". A tight loop traverses the
area arounnd the brick well and yucca plant. Behind the brick well
is the crossover, accessing directly to a wider loop. The left half
is tight, passing between the inner track and the pathway. It swoops
down a gentle grade to the right, through heather plants and past a pine.
The far end is a gentle curve, elevated about two inches because of
drainage. from there, it's a straighaway back to the crossover.
Ballast was 3/8 inch terra-cotta stone. We selected it because it enhances
the brick well area, and would have used it had we elected for a railway
or not. A three-inch trench was filled with the stone. Prior
to filling, a chemical plant killer was sprayed into the trough. (We
plan for annual plant-killer work along the right-of-way). Gravel is
used everywhere except where track is elevated above ground.
The hardest job is screwing track together. Each piece has two screws
underneath, packed in wax. They are tiny. Track was assembled
in segments of five to eight pieces, then emplaced. We did the inner
loop first. Final screwing of segments is done in place. There
are about eight segments, meaning 16 screws.
The grade at the front of the mound was easy - we merely had to employ the
larger four pieces from the trestle set. This swooped right down to
the roadbed beside the pine. The elevated piece at the right corner
used smaller trestle sections. In the grass, it is barely noticeable.
Structures: we bought a bird house and two bird feeders. the birs house
was painted hunter green, then given a brown roof, red peak, and maroon window
trim. The panes were painted blue. It is emplaced on a patio
stone that we bought at a local nursery.
The round gazebo is pale yellow, with hunter green roof and yellow trim.
Seats are red.
The long pavilion is pale yellow, with teal green roof with yellow trim,
and blue and red seats. It is placed beside the brick well.
We opted for birdhouses rather than scale structures, as there are in keeping
with hte nature of the yard. Yhis is NOT a scale pike!
Tools and supplies:
5 X 50-pound bags of terra cotta gravel
Long, thin spade-type shovel
Garden trowels
Round-up plant-killing spray
Ant-killing spray.
3 unpainted wooden birdhouses / bird feeders
1 train set with transformer (we did not use its track)
2 xboxes of 5' diameter curved track
1 x box of 2' straight track
1 x box of 1' straight track
1 x 30 degree crossover
2 x boxes Bachman trestles
1 can indoor/outdoor spray paint - hunter green
1 can indoor/outdoor spray paint - pale yellow
1 bottle teal green acrylic paint for pavilion roof
1 bottle light yellow for gazebo and pavilion roof beams and touch-ups
1 bottle red acrylic for seats and peak
1 bottle maroon acrylic for house doors and window frames
1 bottle blue acrylic for seats
1 bottle hunter green acrylic for touch-ups.
Paint brush set from crafts shop.
The process:
1) we laid out track without connecting it, to see if our plans were correct.
They were. By actually laying track out, we were able to make
minor adjustments. It also made it easier to mark out trench lines.
2) digging - ugh. Track was moved aside while I dug those little trenches.
It was like World War I with the trenches. (All we needed were
little German soldiers and little French soldiers.)
3) chemical warfare - spraying inside and around trenches with defoliant.
We used Round-Up.
4) Trackwork - assembling the eight segments with those nasty little screws
- makes your thumbs sore. Track may still have "give", but at least
the connection is solid for electricity. Besides, track will expand
with heat and shrink with cold.
Segments were emplaced, along with trestle pieces. Final screwing of
segments together.
5) More ballasting: we added more ballast and trued up the roadbed with a
simple gardeners trowel. Spome ballasting was cosmetic.
6) Chemical war again - discovered ants, so we sprayed their hills.
7) First run: well, we finally got to run the train, a Bachman 'Clementine
Mines' set with 0-4-0 loco, red ore car and yellow caboose. Colors
go well with our yard. We used the Bachman power pack, and it ran well.
Train is not a racer, but it certainly performs! Rather than
permanently wire track, we used the track clip with wires that came with
the Bachmann set. This allows us to snap on the power pack easily,
and remove it when done. No additional wiring!
8) The three stations are painted and emplaced. The round gazebo and
house go on those things we bought at the nursery. The long pavilion
rests on gravel.
Click here to return to Garden Railway Index


